
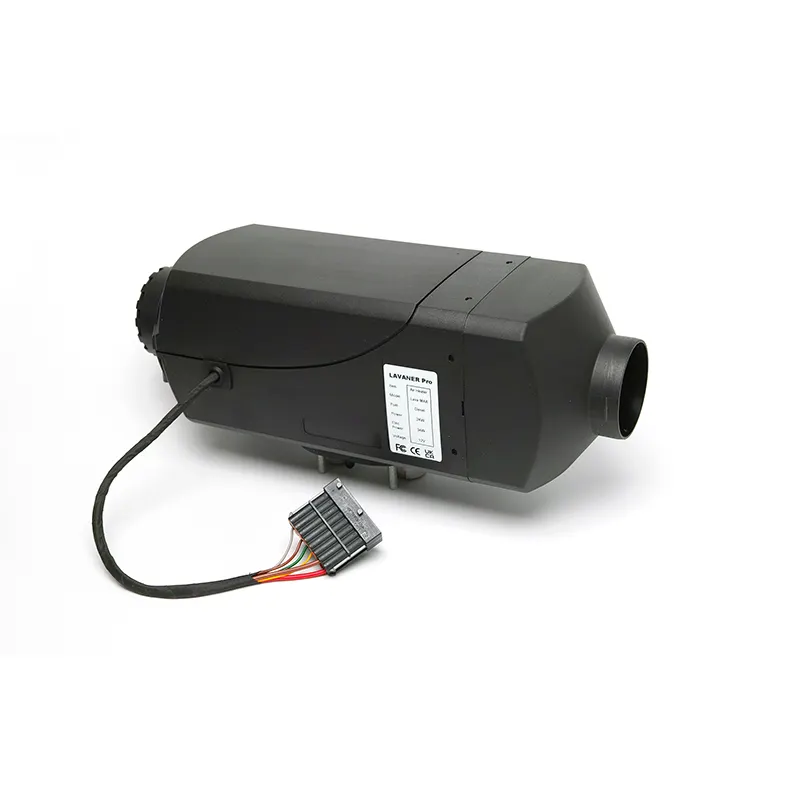
If you enjoy traveling in your campervan, RV, truck, or boat, you’ve probably faced the challenge of staying warm during the colder months. A diesel heater is one of the most practical upgrades you can add. It runs independently of the engine, consumes very little fuel, and keeps your living space cozy. The best part? With the right tools and some patience, you can install it yourself.
In this guide, we’ll walk you through the process of installing a Lavaner diesel heater, step by step, so you can stay comfortable wherever your adventures take you.
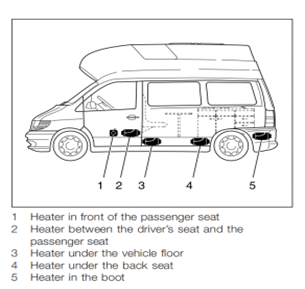
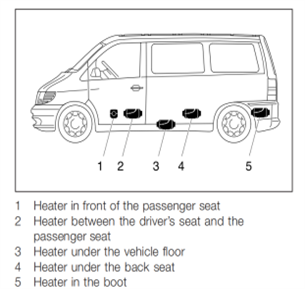
Choosing the Right Location
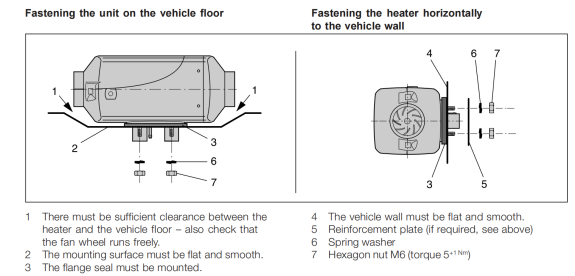
Every installation begins with picking a suitable spot for the heater. Common choices include under a passenger seat, inside the luggage compartment, or even beneath the vehicle floor if properly sealed. Wherever you choose, make sure the surface is flat and sturdy, and that there’s enough clearance for air circulation and future maintenance. You’ll also want to avoid areas near heat-sensitive materials or locations where the heater could be accidentally blocked.
Mounting the Heater
Once you’ve found the right spot, it’s time to secure the unit. Drill openings for ducting, and fuel line as specified in the instructions. If the mounting surface is thin sheet metal, reinforce it with a plate to prevent vibration or damage. Always use the supplied flange seal between the heater and the mounting surface—this ensures a tight fit and prevents fumes from leaking inside.
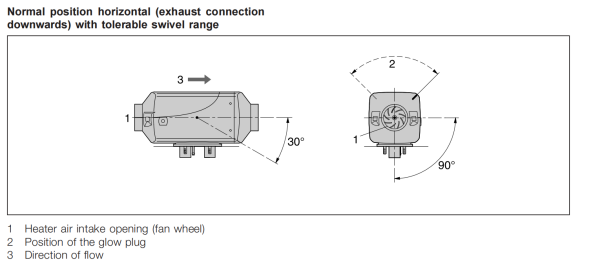
The heater is designed to operate horizontally, but can be tilted slightly if necessary. Just remember: never install it upside down, and always leave enough space around it for safe airflow.
Setting Up Airflow
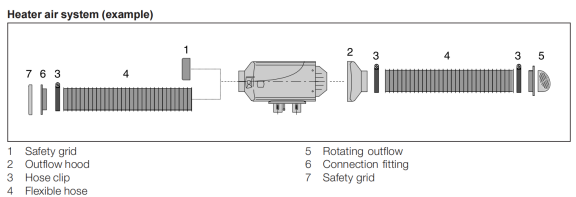
Air circulation is what makes the heater effective. The unit draws in air, heats it, and distributes it into your cabin. For safety, fit the provided grids if no ducts are attached. This prevents objects from blocking the system and avoids accidental contact with hot components. Position the intake in a clean area free from dust or exhaust fumes, and make sure hot air doesn’t blow directly back into the intake—otherwise, the system may overheat.
Exhaust and Combustion Air
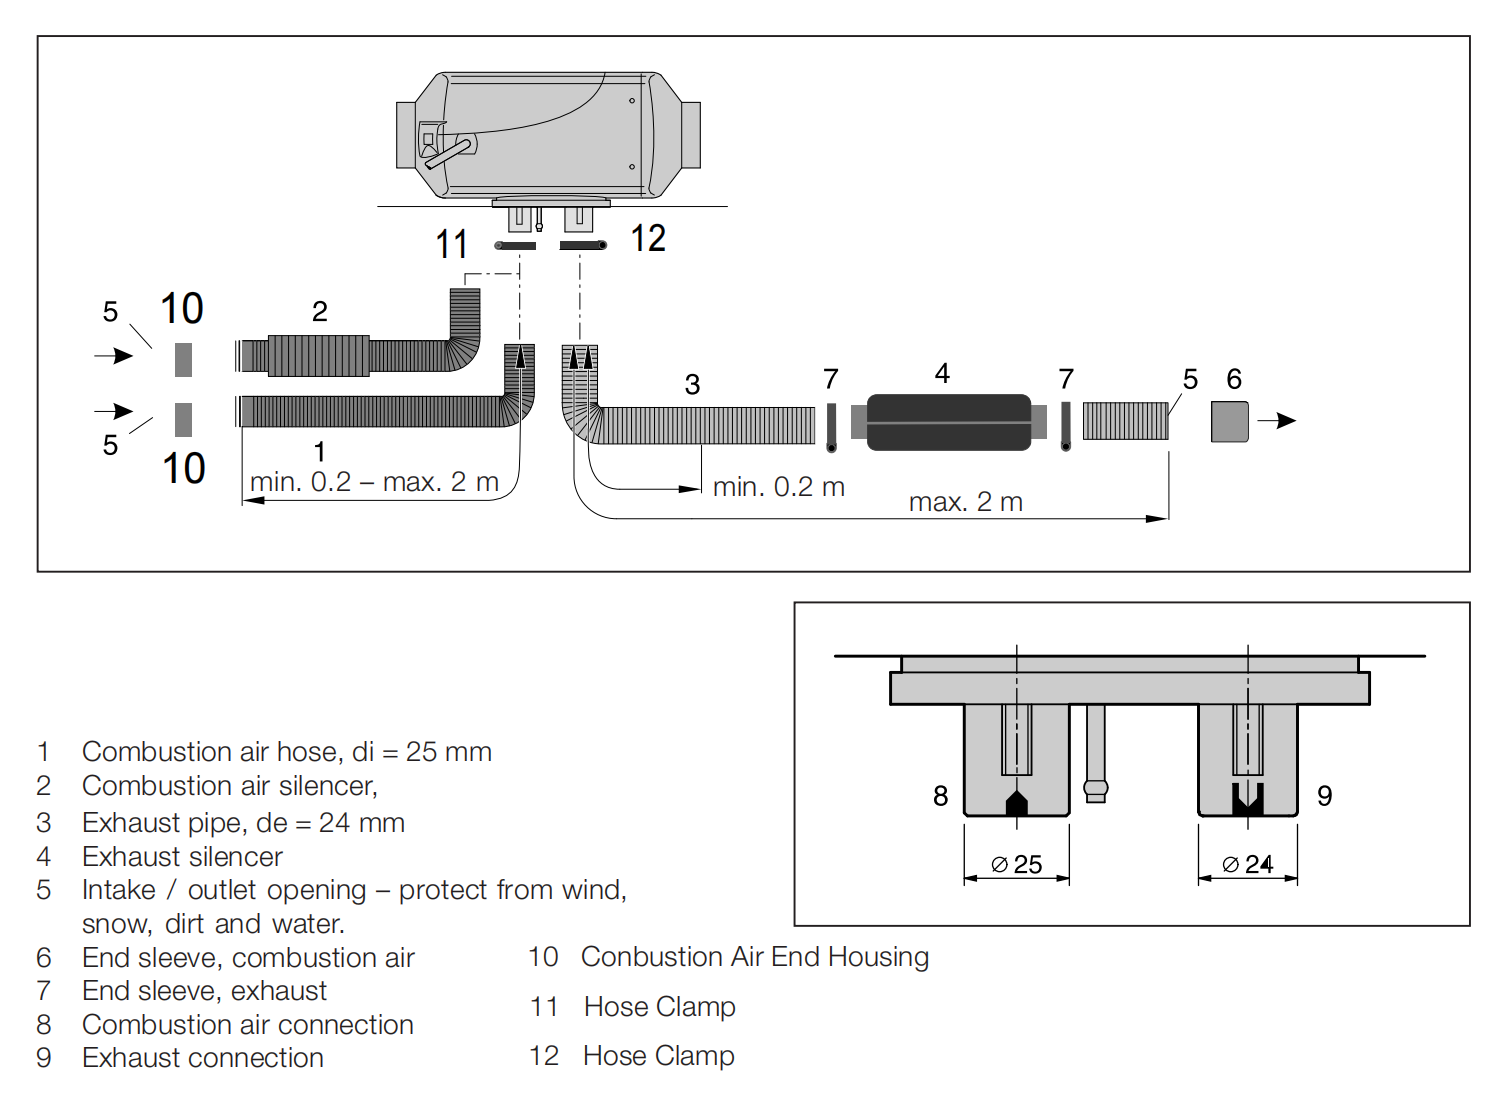
The exhaust system is one of the most critical parts of the installation. Use the flexible exhaust pipe to route gases safely outside the vehicle. The pipe should slope slightly downward so condensation drains out, and it must be firmly secured along its length to prevent vibration damage. Keep it away from fuel lines, cables, and brake hoses, and never let the outlet point toward the driving direction.
Alongside the exhaust, you’ll need to install the combustion air intake hose. Fit it with the silencer included in the kit and position it in a spot where dirt, snow, or road debris won’t block it. Like the exhaust, the hose should slope slightly downward.
Fuel Supply
A diesel heater requires a steady, reliable fuel source. The dosing pump should be mounted near the tank with its outlet pointing slightly upward—between 15° and 35° is ideal. From there, the fuel line must run in a continuous upward direction to the heater. This prevents air bubbles from forming and ensures smooth operation.
You can connect the heater directly to the vehicle’s fuel tank using the supplied fuel pickup tube or a T-piece. Whichever method you choose, always secure the fuel pipes every 50 cm to reduce vibration, and keep them well away from hot exhaust parts.
Electrical Connections
The electrical wiring is straightforward. Simply connect the wiring harness, fuse, and controller according to the supplied diagram. The system is compatible with both 12V and 24V setups, and all critical components are protected by a 15A fuse. Be sure to insulate your connections properly and keep cables away from sharp edges or moving parts.
Testing Your Installation
Before setting off on your next trip, it’s important to perform a bench test. Run the heater for about 10–15 minutes and check that the fan is blowing steadily, the exhaust gases are venting safely outside, and fuel is being delivered smoothly without leaks. Watch for unusual noises or smells, and never interrupt the cool-down cycle by cutting power abruptly.
Final Tips for Safe Operation
- Always turn off the heater before refueling.
- Regularly inspect the air intakes and exhaust outlets to keep them clear.
A properly installed diesel heater will transform the way you travel, making even the coldest nights comfortable. With the steps above, your Lavaner heater will provide reliable warmth wherever the road takes you. Now, grab your tools and get started on your DIY upgrade. Warm adventures await!